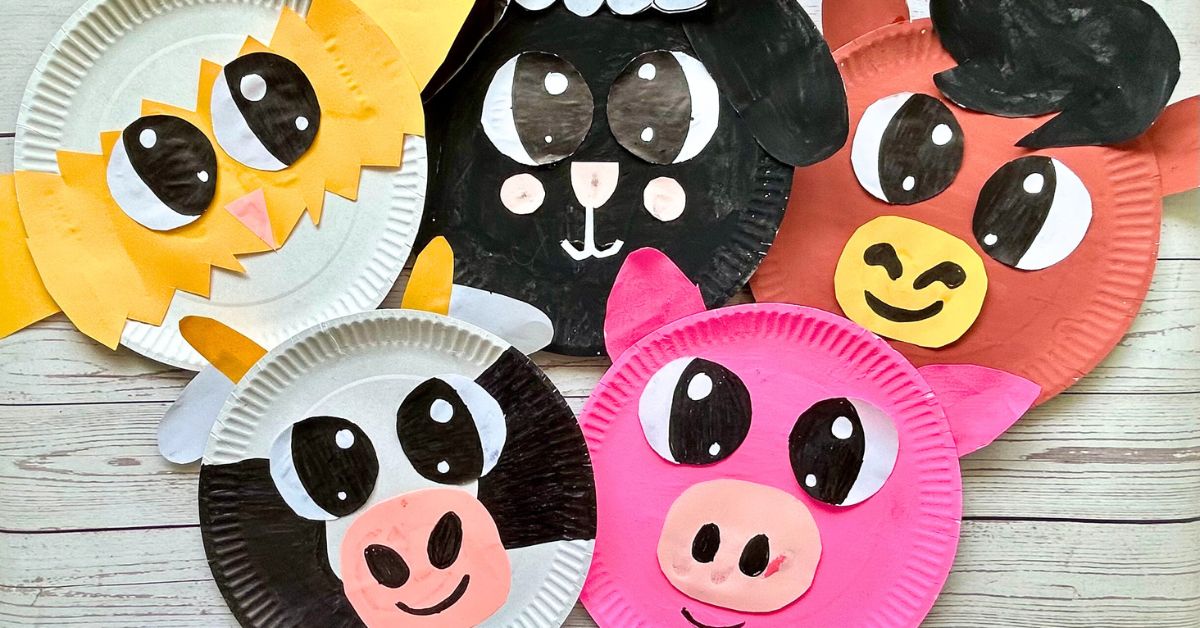
On the hunt for some fun, easy crafts for your toddler or preschooler? Check out these paper plate farm animals! Perfect for young children to get creative and learn about farm animals. If you want, you can also use the time to tell them a bit about the role of farm animals in our lives or to practice farm animals’ sounds.
This easy paper plate farm animal craft activity uses basic materials and can be fun for kids of all ages.
For parents, if you are looking for a way to introduce farm animals while singing the “Old MacDonald Had a Farm” nursery rhyme at home with your toddlers or preschoolers, or if you’re just searching for some cute paper plate crafts to keep your toddler busy, this is for you!
We included instructions for making a cow, horse, pig, chicken, and sheep. You’ll find detailed instructions below. Please note that scissors will be used for this activity, and assistance from grown-ups is needed.

Craft Materials
Below are the suggested materials you need. Of course, you can swap out, for example, acrylic paint with watercolors for kids or with colored paper. The marker pen can be changed to crayons.
Painting eyes can be difficult for a toddler, and you can certainly use googly eyes instead and let your little one glue them to the paper plate with a glue stick. In addition, you can use yarn for the horses’ mane instead of paper. The possibilities are endless and mainly depend on how interested your child is. With my daughter, I would have added yarn, glitter, and a lot more. With both my boys, getting them to do any crafts at all was a challenge, and I had to really keep it simple!
Materials:
- Paper Plates
- Colored Paper
- Marker pens or crayons
- Scissors
- Acrylic Paint (or watercolor)
- Paint Brush
- (Possibly googly eyes and a glue stick)
Step-by-step Instructions
Farm Animal Eyes
Let’s first create the farm animal eyes by tracing, cutting, and coloring white paper. The same type of eyes can be used for all the animals, so make five pairs if you plan to do all the farm animal crafts with your child. (If you want to use googly eyes instead of paper eyes, you skip this step.)
Step 1. Fold the white paper length twice.

Step 2. Trace any round shape you have in your home.

Step 3. Cut the trace circle shape using scissors.

Step 4. Draw the pupils of the eyes and use a marker or crayons to color them.

Paper Plate Sheep
The first farm animal out is a sheep. Baa, baa! 🙂
Step 1: Paint the paper plate black. It will serve as the face of the sheep.

Step 2: Trace and cut the parts of the face of the paper plate sheep.
You’ll need ears, nose, blush, and mouth. I also made head wool fur from paper, but you can also have your child glue cotton balls or yarn as fur.
Draw a cloud-like shape for the “hair” of the paper plate sheep. The size should be appropriate for serving as bangs on the sheep’s face (the paper plate).

Cut out the shape using scissors.

For the sheep’s ears, cut an oblong shape from white paper and paint it black with, e.g., a marker or acrylic paint. You can also use colored paper in black.

Cut three small shapes that will serve as the nose and blush.

Step 3: Assemble the paper plate sheep face parts.

Glue the sheep face parts on the paper plate. Paint a happy mouth in white or red unless you cut out a little mouth in the previous step.

Ready! Now on to the next farm animal – a cow (you can use black paint for this one too, so it is practical to make the sheep and the cow at the same time).
Paper Plate Cow
Step 1: Trace a cow-like pattern on a paper plate using a marker or a crayon, and color the pattern black with paint, crayons, or a marker.

Step 2: Trace and cut the parts of the face of the paper cow sheep. You’ll need ears, horns, and a nose.
Cut two half-oblong colored yellow paper for horns and bigger ones for ears from white paper.

Cut a less-than-perfect circle shape for the muzzle and use the marker to draw nostrils and a mouth.

Step 3: Assemble the paper plate cow face.

Use glue to put the cow face together.

And here you have the finished cow craft!

Paper Plate Pig
Now, let’s make a pig. This craft is easy and has just a few steps, so if you have a reluctant toddler, you may want to start with this farm animal. It may also help that it is colorful!
Step 1: Color a paper plate pink for the pig’s face.

Step 2: Trace and cut the parts of the face of the paper plate pig. You’ll need a snout and ears.
Paint the ears the same pink as the face, or use the same colored paper as for the snout.

Step 3. Assemble the paper plate pig face parts. Use glue to paste the pig’s facial features.

Step 4. For a finishing touch, draw a smiling mouth.

And here’s the completed pig!

Paper Plate Chicken
Now, the second to last farm animal is a chicken. Here, a bit more “advanced” (for a toddler) cutting is needed if you use colored construction paper for the face and wings. You can, of course, also use colored feathers for the wings. Other than that, this is a super easy craft.
Step 1. Trace and cut the parts of the face of the paper plate chicken. Size the yellow-colored paper on the paper plate and cut the excess-colored paper. make the sides in an uneven “feather-shape” as below.

Next, for the wings, fold the paper in half, trace it, and cut it like in the photo below, so you make two identical wings.

While not in the picture above, you can also take some pink or red paper and cut a triangle for a beak. Or you just let your child paint one.
Step 3. Assemble the chicken, both the face and the wings, and glue everything together. Draw a beak if you haven’t cut a paper for it.

Aaand ready!

Paper Plate Horse
Now to the final paper plate farm animal – the horse! I made the mane from paper too, but you can certainly use yarn or even cotton for it.
Step 1. Paint the paper plate brown. It will serve as the horse’s face.

Step 2. Trace and cut the parts of the face of the paper plate horse – the ears, mane, and muzzle. Let’s start with the ears.

After the ears, draw a wavey mane for the paper plate horse and color it using a marker, acrylic paint, watercolor, or crayons – all depending on what material you have and who will do the actual coloring (you, your toddler, or older child). You can also use yarn for the mane instead of paper.

Finally, cut a somewhat irregular circle shape for the muzzle, and use markers or crayons to draw the nostrils and mouth. If you don’t have yellow or, e.g., pink construction paper, use white paper and color it.

Step 3. When all these facial parts have been created, once again glue them to the paper plate to create the farm animal.

And done!

That was it! I hope you (and your child!) found these easy kids’ craft activities fun to do.
For parents, you can, of course, use these farm animals further, for example, by singing songs like the “Old MacDonald Had a Farm” nursery rhyme and using the paper plate animals as puppets. Or you can bring your toddler and the animals to a farm and zoo and look at the real animals. Have fun!
More Toddler Crafts and Activities

Paula Dennholt founded Easy Baby Life in 2006 and has been a passionate parenting and pregnancy writer since then. Her parenting approach and writing are based on studies in cognitive-behavioral models and therapy for children and her experience as a mother and stepmother. Life as a parent has convinced her of how crucial it is to put relationships before rules. She strongly believes in positive parenting and a science-based approach.
Paula cooperates with a team of pediatricians who assist in reviewing and writing articles.

